Make and Use a Scratch Stock

Experience Level: Any

Instructor: Ryan Barnard
His Website
Moderator: Jamie Harpster

Class Size: 10 Students

Sessions: 1 sessions at 4-5 hours

This course will be via Zoom.
Course Description

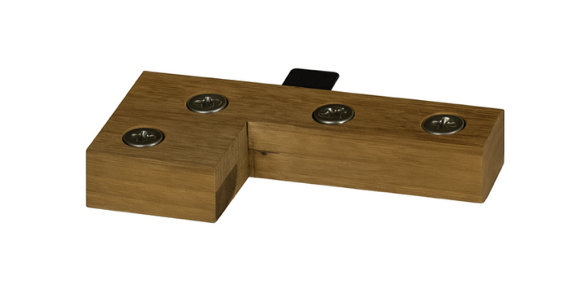
In this class, we will guide you step-by-step through the process of making your own scratch stock, a fundamental hand tool used to create decorative molding profiles. You will learn essential hand tool skills, including safe sawing, filing, and sharpening, while creating a tool with four distinct profiles: Ogee, Ovolo, Bead, and Reed.

Learning Objectives:

Understand the function and components of a scratch stock.
Practice safe use of hand saws, files, and a vise.
Accurately transfer and mark a pattern onto a steel blank.
Shape and refine four different molding profiles using hand files.
Properly sharpen the steel cutter to a razor edge.
Assemble the wooden body and attach the steel cutter.


Part 1: Preparing the Wooden Bodies (1 hour)
1. Making Two Wood Stocks: One for cutting profiles in square material, and one for rounded surfaces.

Part 2: Shaping the Steel Cutter (1.5 – 2 hours)
1. Layout the Profiles:
Ogee: S-shaped curve.
Ovolo: Quarter-round convex curve.
Bead: Semicircular profile.
Reed: A small, flat-bottomed bead, often in a series.

2. Rough Shaping with Files: We will start with the larger flat and half-round files to remove the bulk of the material. Work slowly and check your progress frequently.

3. Refining with Needle Files: For the finer details of the profiles, especially the Ogee and the tight curves of the Reed, the needle files are essential. Take your time to clean up the curves and ensure they are symmetrical.

4. Checking the Profiles: The Cabinet Maker will demonstrate how to use a straight edge and your eye to check the profiles for accuracy and smoothness.

5. Initial Sharpening: With the shaping complete, use a sharpening stone to bring an initial edge to the cutter. This is a critical step for a clean cut later on. We’ll show you how to maintain a consistent angle.

Part 3: Final Assembly & Testing (30 minutes – 1 hour)

1. Installing the Cutter: Position the shaped steel blank between the two halves of the wooden body, with the profiles extending slightly below the bottom edge.

2. Securing the Cutter: Carefully tighten the screws, ensuring the blade is held securely but not so tightly that the wood is damaged.

3. Practice and Review: The instructors will demonstrate the proper technique for using the scratch stock. We will practice making different profiles on a piece of scrap wood.

4. Student Show-and-Tell: Each student gets a chance to demonstrate the tool they made and the profiles they created. We’ll provide feedback on technique and sharpening.

Wrap-Up & Group Review (15-30 min)
 Student show-and-tell.
 Instructor feedback.
 Review of tool care and maintenance.

Tools & Materials Needed

Required Tools:

Vise
Hacksaw (recommended)
Flat (mill) file
Half-round file
Round (rat-tail) file
Half-Round Rasp
Needle files (recommended)
Sharpening stone
Tenon Saw or Carcass Saw
½” Chisel
Drill with 1/8″ bit and countersink bit
Screwdriver for screws
Compass/Dividers
Pencil and Graphing Paper
Sharpee or Machinist Layout Fluid

Scratch Awl


Required Materials:

Two pieces of 3/4″ ×3−1/2″×7″ wood
8-10 pieces of 5/8″ long woodscrews
2-4 scratch stock blanks like this (you can use old saw blades or card scrapers)
Scrap wood to practice mouldings

Course Cost*

 $100

Save up to 25% on our courses by becoming a Plane Wellness Member, learn more here

*If you qualify for a free course you will not be charged for anything. Application steps are in the registration form or click HERE to see if you qualify.

Course Dates

Date: December 13th, 2025
Start Time: 12:00 PM CST (10:00 AM PST / 11:00 AM MST / 1:00 PM EST)
End Time: 5:00 PM CST (3:00 PM PST / 4:00 PM MST / 6:00 PM EST)

Register/Apply Below!